

Removing a Misaligned DTF Transfer: A Step-by-Step Fix
Editorial TeamLast Updated: October 30, 2026
Quick Summary
To remove a misaligned DTF transfer, reheat the adhesive with low, even heat and peel the film back slowly at a shallow angle, keeping one hand flat on the shirt to hold the fibers down. Stop and reheat if the film fights you, then clean up residue before deciding whether to repress.
- Never pull cold film, because it takes fabric fibers with it.
- Use a lower temperature than your original press and keep the cover sheet on.
- Start peeling at one corner and pull back at a shallow angle close to the fabric.
- Reheat residue and dab it with a clean cloth or parchment, never scrub.
- Stop removal after three passes without meaningful lift and plan a reprint.
Table of Contents
- Why a Misaligned DTF Transfer Happens and What Removal Can Realistically Fix
- How to Remove a DTF Transfer from Shirt: Step-by-Step
- DTF Transfer Removal Methods: Heat Press, Iron, and Cover Sheets Compared
- Can You Press DTF Over DTF? What to Know Before You Try
- Temperature and Timing Safety Ranges by Fabric Type
- How to Prevent DTF Transfers from Shifting on the Next Press
-
When to Stop and Start Fresh: A Stop-or-Proceed Decision Tree
- Step 1: Score the transfer before you start
- Step 2: Proceed with removal only when the odds are with you
- Step 3: Stop and start fresh when the risk outweighs the reward
- Step 4: Read the result of a partial removal
- Step 5: Decide between covering, repositioning, and replacing
- Step 6: Know when to stop entirely
- Ordering Replacement Transfers for a Clean Re-Press
- Frequently Asked Questions
Why a Misaligned DTF Transfer Happens and What Removal Can Realistically Fix
A misaligned DTF transfer is a printed direct-to-film design pressed onto a garment off-center, crooked, or too high or low; removal means reheating the adhesive to lift it back off.
Misalignment usually traces back to one of four causes:
- The shirt shifted on the platen after you laid it down
- The transfer was placed by eye instead of against a center crease
- The cover sheet dragged the film during pressing
Removal can fix placement. It cannot fix a design that is the wrong size or shape, or already fused deep into the fibers. Set expectations there before you start.
How to Remove a DTF Transfer from Shirt: Step-by-Step
Removing a DTF transfer works best while the print is fresh. Our FAQ covers common DTF questions, including official heat press instructions.
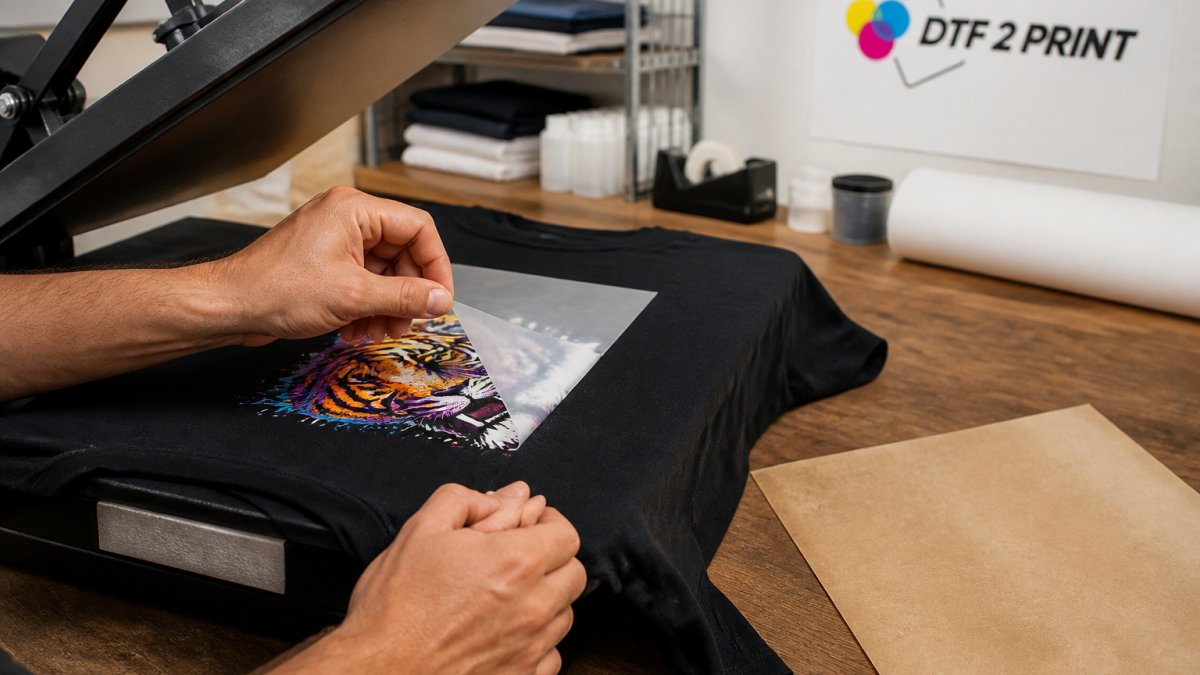
Step 1: Reheat the Adhesive with Low, Even Heat
Warm the transfer just enough to soften the glue, not cure it deeper. Use a lower temperature than your original press, keep the cover sheet on, and move the heat source in slow, even passes. The film should feel warm and slightly tacky at the edges, never hot enough to distort the print.
- Heat press: light pressure, short dwell, cover sheet down
- Household iron: no steam, medium-low setting, constant motion
- Stop the moment the corners start to curl
Step 2: Peel Slowly and Protect the Fabric
Start at one corner and pull back at a shallow angle, close to the fabric, keeping one hand flat on the shirt to hold the fibers down. If the film fights you, stop and reheat, forcing it causes fabric damage.
Step 3: Clean Up Residue and Decide Whether to Repress
Some adhesive residue will stay behind. Reheat that spot and dab it with a clean cloth or parchment, do not scrub. Once cool and flat, check it in good light. If the fabric looks clean, press a new transfer over it; if it looks shiny or stiff, stop and read the decision tree below.
DTF Transfer Removal Methods: Heat Press, Iron, and Cover Sheets Compared
A heat press gives you the most control for DTF transfer removal, a household iron works in a pinch, and a cover sheet protects the garment either way. The method matters less than the heat discipline.
| Method | Control | Best For | Watch Out For |
|---|---|---|---|
| Heat press | High | Fresh prints, delicate fabrics | Overheating on a second pass |
| Household iron | Medium | Small areas, quick fixes | Steam and uneven pressure |
| Parchment paper | N/A (cover) | Protecting the print and fabric | Paper shifting mid-press |
| Teflon sheet | N/A (cover) | Repeated reheating | Trapping too much heat |
A common mistake is reaching for the iron because it is closer. On a polyester blend, a steaming iron leaves a sheen you cannot undo.
Can You Press DTF Over DTF? What to Know Before You Try
Yes, you can press DTF over DTF, but only when the first layer is flat, clean, and fully cured.
Our rule: press over DTF only if the old print passes three checks.
- It sits flat with no raised edges
- There is no sticky or shiny residue
- The fabric under it is not stiff or scorched
If all three pass, press the new design at your normal settings with a cover sheet. If any fail, remove the old print first or start fresh.
Temperature and Timing Safety Ranges by Fabric Type
Safe removal heat depends on the fabric, not the print. The goal is to soften the adhesive without driving heat deeper into sensitive fibers. Cotton tolerates more heat, while polyester and performance blends need less. For detailed pressing guidance on each material, see how to press DTF transfers on different fabrics. Always start lower than you think you need and add heat in small steps.
Start with a test pass, not a full pass
Before committing to a temperature, run one short test pass on an inconspicuous area, inside the hem, under the arm, or a spare offcut of the same fabric. Press for a few seconds, let it cool, and check for sheen, shrinkage, or fiber flattening. If unchanged, proceed; if shiny or stiff, drop the temperature and shorten the dwell before trying again.
Fabric-by-fabric starting points
- Cotton: medium-high heat, short passes of a few seconds each, watch for scorching and yellowing.
- Polyester: low to medium heat, quick passes, watch for sheen, shrinkage, and dye migration. Polyester fibers are heat-set, so excess heat can flatten them into a permanent shine.
- Performance blends: lowest heat, shortest passes, watch for fiber distortion and loss of stretch. These fabrics often carry spandex or elastane that degrades under repeated heat.
The mechanism behind the risk
DTF adhesive softens at a lower temperature than the point where most synthetic fibers distort. That window is wide on cotton and narrow on polyester and performance fabrics.
That is why the number of passes matters as much as the temperature. Two short passes at a lower setting are usually safer than one long pass at a higher setting, because the fabric cools between passes while the adhesive still softens.
Timing rules that apply to every fabric
- Keep each pass short, a few seconds, and inspect between passes.
- Let the garment cool slightly between passes so heat does not accumulate in the fibers.
- Stop the moment the corners of the film start to curl; that is your signal the adhesive is ready.
Heat sensitivity is the whole game. A transfer that lifts cleanly on cotton can leave a permanent shine on polyester in the same number of passes. When in doubt, go lower and slower.
How to Prevent DTF Transfers from Shifting on the Next Press
Prevention is cheaper than removal. Most shifting comes from a shirt that was never locked in place and a transfer placed by eye.
- Fold the shirt and press a center crease to use as your center line
- Line the design up against the crease and the shoulder seams
- Use a ruler or alignment tool for repeat orders
If you press the same design weekly, build a simple jig or mark your platen once and use it every time.
When to Stop and Start Fresh: A Stop-or-Proceed Decision Tree
Not every misaligned DTF transfer should be removed. Some are safer to reprint than to fight, and some are past the point where heat will help. Use this sequence before you touch the heat, and revisit it after every pass.
Step 1: Score the transfer before you start
Answer these four questions honestly. Each "no" pushes you toward stopping.
- Age: Was the print pressed within the last few days and never washed or worn?
- Fabric: Is the garment cotton or a sturdy blend rather than thin, stretchy, or heat-sensitive?
- Location: Does the design sit on a flat area rather than over a seam, pocket, zipper, or hardware?
If all four answers are yes, proceed to removal. If one is no, proceed with caution and expect a partial result. If two or more are no, stop and plan a reprint instead.
Step 2: Proceed with removal only when the odds are with you
Removal is most likely to succeed when the print is fresh, the fabric is forgiving, the design is on flat ground, and the mistake is small. In those cases, follow the step-by-step method and inspect after each pass.
Step 3: Stop and start fresh when the risk outweighs the reward
Stop and plan a reprint if any of these are true:
- The print has been washed or worn, which drives adhesive deeper into the fibers.
- The fabric is thin, stretchy, or heat-sensitive, where a failed removal leaves a visible scar.
- The design crosses seams, pockets, or hardware, where heat cannot reach evenly and fabric damage is likely.
Step 4: Read the result of a partial removal
A failed or partial removal usually shows up in one of four ways. Each has a different next step.
- The film tears and leaves patches behind: stop pulling, reheat the remaining patches, and lift them individually. Do not pick at cold adhesive.
- Adhesive residue remains but the film is gone: reheat the spot and dab it with a clean cloth or parchment. If residue persists after two attempts, treat the area as unsuitable for a second press.
- The film lifts only at the edges: the center is still bonded. One more short pass may free it; if not, stop. A center that will not release usually means the adhesive has cured into the fibers.
Step 5: Decide between covering, repositioning, and replacing
If removal is off the table, you still have options short of scrapping the garment.
- Cover the mistake: press a new design over the old one only if the old print is flat, clean, and residue-free. See the section above on pressing DTF over DTF for the three checks.
- Reposition: if the misalignment is small and the garment has open space, press the corrected design in the right spot and leave the old print where it is, provided it does not overlap.
- Replace the garment: when the fabric is damaged, the residue will not clear, or the old print sits where the new design must go, a fresh garment plus a fresh transfer is the cleanest path.
Step 6: Know when to stop entirely
Stop all removal attempts when the fabric shows sheen, scorching, shrinkage, or fiber flattening, or after three passes without meaningful lift. At that point the garment is a cover-up candidate or a reprint.
Ordering Replacement Transfers for a Clean Re-Press
A clean re-press starts with a fresh transfer, not a rescued one. When a design is ruined, the fastest path to a sellable shirt is a new print with corrected placement baked in. Build your DTF gang sheet to order replacement transfers with corrected artwork.
- No minimum quantity, so you can reprint a single design
- Custom gang sheet building options
- Fast turnaround times
Frequently Asked Questions
Can you remove a misaligned DTF transfer without damaging the shirt?
Often, yes, but it depends on the fabric and how long the transfer has been cured. Reheating the adhesive with low, even heat lets you peel the film back slowly. Cotton handles this best; polyester and blends carry more risk of scorching or fiber distortion because they are heat sensitive. Always test on an inconspicuous area first, use a protective cover sheet, and stop if the fabric starts to shine or stiffen. If the transfer has been washed and cured for days, removal becomes much harder.
Can you press DTF over DTF to cover a crooked print?
You can press a new DTF transfer over an existing one, but the result is usually thick, stiff, and uneven. The second layer bonds to the first film rather than the fabric, so adhesion and stretch suffer. It works as a short-term fix for a small offset, not a permanent solution. For a clean look, remove the misaligned transfer first, then repress a fresh one onto the bare garment.
What temperature should I use to loosen a DTF transfer for removal?
Use low heat, well below the original press temperature, and work in short bursts rather than one long press so you do not overheat the fabric fibers. Always place parchment paper or a Teflon sheet between the iron and the transfer.
How do I prevent DTF transfers from shifting during pressing?
Lock the placement before you press. Fold the shirt in half to find the center crease, line up shoulder seams, and mark the center chest with a ruler or alignment tool. Use heat-resistant tape or a light tack press to hold the transfer in place. Press with firm, even pressure and avoid sliding the transfer once it touches the adhesive. Checking alignment twice before the final press saves far more time than removing a crooked print.
A misaligned press is frustrating, but it is rarely the end of the shirt. The fix is discipline: reheat low, peel slow, clean up, and reprint when removal stops being worth the risk. DTF 2 Print makes the reprint step easy with no minimums, gang sheet building, and fast turnaround on press-ready transfers for cotton, poly, and blends. Get started with DTF 2 Print and turn a bad press into a clean re-press today.
