

How to Apply DTF Transfers to Canvas Without Cracking
Editorial TeamLast Updated: November 2, 2026
Quick Summary
Apply DTF transfers to canvas at 300°F to 320°F for 10 to 15 seconds at medium-heavy pressure, then cool peel the film slowly from one corner. Pre-press the canvas for 3 to 5 seconds first to remove moisture, and post-press for 5 seconds to lock adhesion.
- Pre-press canvas for 3 to 5 seconds to remove trapped moisture before applying the transfer.
- Cool peel the transfer film slowly at a low angle instead of hot peeling on textured canvas.
- Insert a firm pressing pad inside canvas tote bags so the press hits a flat surface.
- Add 2 seconds to dwell time rather than raising temperature when a transfer fights the peel.
- Wash canvas items inside out in cold water and skip the dryer to prevent cracking.
Table of Contents
- What You Need Before Applying DTF Transfers to Canvas
- DTF Transfer Temperature and Time for Canvas
- Step-by-Step DTF Transfer Application on Canvas
- How to Heat Press DTF Transfers on Canvas Tote Bags
- DTF Transfer Application with an Iron
- Managing Canvas Texture, Layering, and Long-Term Durability
- DTF Transfer Troubleshooting on Canvas
- Build Your DTF Gang Sheet for Canvas Projects
- Frequently Asked Questions
What You Need Before Applying DTF Transfers to Canvas
Applying DTF transfers to canvas works best when you prep the right tools first. Canvas is a rough, open-weave fabric, so it fights adhesion more than cotton tees do.
Here is what you need before you start:
- Heat press (preferred) or a household iron
- DTF transfer printed at 300 DPI
- Heat-resistant tape for positioning
- Parchment paper or a Teflon sheet as a protective sheet
- A firm, flat work surface
- Canvas item (tote bag, zipper pouch, or flat panel)
A common mistake is skipping a test press. You can learn how to test DTF transfers before production so a bad setting never ruins a good blank.
The real difference between a transfer that lasts and one that peels comes down to two things: even pressure and a fully cured transfer film. Get those right and canvas stops being difficult.
DTF Transfer Temperature and Time for Canvas
The standard DTF transfer temperature and time for canvas is 300°F to 320°F for 10 to 15 seconds at medium-heavy pressure.
Settings to start with:
- Temperature: 300°F to 320°F
- Dwell time: 10 to 15 seconds
- Pressure: medium to heavy
- Peel: cool peel for textured canvas
Watch out: too much heat scorches the canvas coating, and too little leaves the ink uncured. Both cause a transfer failure you cannot fix after the fact. Start in the middle of the range, then adjust one variable at a time.
Step-by-Step DTF Transfer Application on Canvas
The application workflow is simple: pre-press, position, press, peel, and post-press. Follow the order and you avoid most transfer failures before they happen.
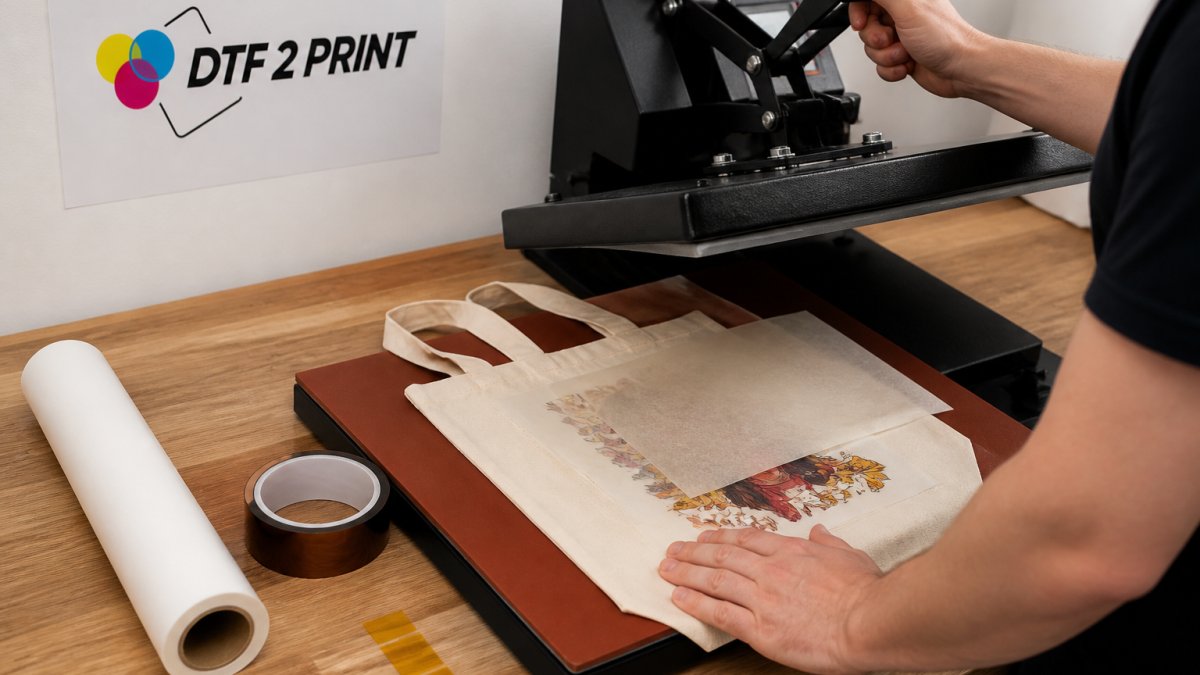
- Pre-press the canvas for 3 to 5 seconds to remove moisture.
- Place the transfer face down and tape the corners with heat-resistant tape.
- Cover with parchment paper or a Teflon sheet.
- Press at 300°F to 320°F for 10 to 15 seconds.
- Cool peel the transfer film slowly from one corner.
- Post-press for 5 seconds with the protective sheet to lock adhesion.
Pre-Pressing the Canvas Surface
Pre-pressing removes trapped moisture and flattens the fabric weave. Skip it and steam gets trapped under the transfer film, which lifts the ink during the peel. Give canvas a quick 3 to 5 second pre-press every time.
Cool Peel vs. Hot Peel on Canvas
Cool peel wins on canvas. Let the transfer cool for 5 to 10 seconds, then peel slowly at a low angle. Hot peel can pull ink out of the rough surface texture before it bonds. If your transfer film fights you, wait a little longer, not less.
How to Heat Press DTF Transfers on Canvas Tote Bags
Tote bags need extra care because of seams and uneven surfaces. When you heat press DTF transfers on canvas tote bags, insert a firm pressing pad inside the bag.
A few tote bag specifics:
- Use medium pressure so seams do not create dead spots. Heavy pressure on a seam can leave a permanent crease in the canvas.
- Avoid the handle seams when positioning your design. Keep artwork at least a half inch away from any seam.
- Press in one pass rather than two short ones. Two passes double the chance of the transfer shifting between presses.
- Cool peel to protect the fabric weave.
Thick seams can leave a faint pressure line, so position your artwork clear of seams. If a seam runs under the center of your design, build up the area with a small piece of canvas scrap taped in place so the press hits an even surface.
Managing Seams and Dead Spots
A dead spot is an area where the press cannot reach the canvas because a seam or fold is holding the fabric away from the platen. On tote bags, the handle attachment points are the usual culprits.
Watch out: pressing directly over a metal rivet or a thick seam can crack the transfer film at that point. If your design must cross a seam, press that area first with a scrap of parchment paper over the seam to flatten it, then apply the transfer in a second pass.
Tote Bag Pressure and Dwell Adjustments
If the transfer peels cool and cleanly, you are in the right zone. If it fights you or leaves ink behind, add 2 seconds to the dwell time rather than raising the temperature, higher heat risks scorching the bag's coating.
For bags with a coated or waxed interior, place a piece of parchment paper inside the bag before inserting the pressing pad. The coating can transfer to the pad and then to the next project.
DTF Transfer Application with an Iron
A household iron works for DTF transfer application, but it takes patience. You cannot control pressure the way a heat press does, so you press longer and harder.
How to do it:
- Set the iron to the cotton or highest dry setting, no steam.
- Use a hard, flat surface, not an ironing board.
- Press firmly for 30 to 45 seconds, moving slowly.
- Apply steady body weight across the whole design.
- Cool peel as normal.
What most guides miss is that an iron's pressure is uneven at the edges. Go over the border of the transfer twice. If you are pressing a lot of canvas items, a real press pays for itself fast.
Managing Canvas Texture, Layering, and Long-Term Durability
Canvas texture is the number one cause of poor adhesion, and most tutorials ignore it. The rough fabric weave leaves tiny air gaps under the transfer film, so the ink bonds to the high points of the weave but bridges the low points. Under wash and flex, those bridges crack first. The fix is not more heat, it is more pressure and a flatter surface before the transfer ever touches the canvas.
Mitigating Canvas Texture Before You Press
Start by identifying your canvas grain. A fine, tight weave (often labeled cotton duck 10 oz or lighter) accepts DTF ink with minimal prep.
Three concrete steps flatten the weave:
- Pre-press longer on coarse canvas, 5 to 8 seconds instead of the standard 3 to 5, to drive out moisture and relax the fibers.
- Use a firm pressing pad (a silicone pad or a folded piece of canvas) under the blank so the press pushes the weave flat rather than compressing it into empty space.
- Increase pressure one notch above what you would use on cotton.
Watch out: over-compressing a coated canvas can crush the sizing and leave a shiny, glazed patch that will not accept ink evenly. If the surface looks polished after pre-pressing, you have gone too far, back off the pressure.
Layering and Multi-Color Alignment on Textured Canvas
Aligning a second color on canvas is harder than on cotton because the texture lets the transfer film shift during the press. The workflow that works:
- Press the first layer and cool peel completely before starting the second. Do not try to layer while the first transfer is still warm.
- Tape the second layer with heat-resistant tape on all four sides, using the first layer as your visual registration mark. Tape prevents the film from creeping as the press closes.
- Press each layer separately at the same temperature and time. Trying to press two layers at once traps air between the films and causes bubbles.
- Use a Teflon sheet between layers so the first layer does not stick to the upper platen.
A common pattern is for the second layer to sit a fraction of an inch off after pressing. If that happens, check that your tape is actually holding the film flat, on coarse canvas, tape only on the corners lets the center bow up.
Long-Term Durability on Canvas Art
Existing guides stop at the first press. Canvas art, however, lives on walls and bags that see humidity, light, and handling. Thermal bonding holds up when the ink was fully cured, but three environmental factors shorten its life:
- Humidity softens the cured film over time. Store canvas items in a dry space, and avoid hanging canvas art in bathrooms or kitchens where steam is constant.
- Direct sunlight fades DTF pigments faster than it fades screen-printed ink. Keep canvas art out of direct sun, or accept that colors will shift over a year or two.
- Abrasion from folding and stuffing tote bags breaks down the bond at the edges first. Reinforce high-wear edges with a 5-second post-press after the cool peel.
For washing, turn canvas items inside out, use cold water, and skip the dryer. A common pattern is for transfers to survive dozens of cold washes but fail after one hot dryer cycle.
DTF Transfer Troubleshooting on Canvas
Most canvas transfer failures trace back to four causes. Here is the quick fix for each:
| Problem | Likely Cause | Fix |
|---|---|---|
| Peeling edges | Under-pressed corners | Re-press edges 5 seconds |
| Cracking after wash | Ink not fully cured | Raise dwell time |
| Patchy adhesion | Moisture in canvas | Pre-press longer |
| Misaligned design | No tape or shifting | Tape before pressing |
If a transfer lands crooked, you can follow a full step-by-step fix for removing a misaligned DTF transfer without ruining the blank. For stubborn peeling, re-cover with parchment paper and press again for 5 seconds. Never iron directly on the transfer film, because it will melt onto your iron.
Build Your DTF Gang Sheet for Canvas Projects
Gang sheets keep canvas projects cost-effective because you fit many designs onto one sheet. If you are ready to create yours, you can build your DTF gang sheet with our online tool. Read 7 steps to set sheet size in a DTF builder correctly before you order.

If your artwork is already prepped, just upload your DTF gang sheet and we print it at 300 DPI. Free shipping applies to U.S. orders over $100.

Frequently Asked Questions
Can DTF transfers be applied to canvas?
Yes. DTF transfers bond to canvas fabric through thermal adhesion, and the process works on cotton canvas tote bags, zipper pouches, and similar woven substrates. The key is pre-pressing to remove moisture and flatten the weave, then pressing at the right dwell time and pressure. Because canvas has a rougher surface texture than a T-shirt, transfers can sit slightly into the weave, so a firm press and a cool peel give the cleanest result.
What temperature and time should I use for DTF transfers on canvas?
Most DTF transfers to canvas press at 300 to 320 degrees Fahrenheit for 10 to 15 seconds with medium to firm pressure. Always pre-press the blank for 5 to 10 seconds first to flatten the surface and drive out moisture, which is the most common cause of adhesion failure.
Can I apply a DTF transfer to canvas with a household iron?
A household iron can work for small canvas items, but it delivers uneven pressure and heat compared with a heat press. Set the iron to its highest cotton setting with no steam, place a teflon sheet or parchment paper over the transfer, and press firmly in overlapping sections for 15 to 20 seconds each. Expect a longer dwell time than with a heat press.
How do I prevent a DTF transfer from lifting or cracking on canvas?
Pre-press the canvas to remove moisture, use heat-resistant tape to hold the transfer flat, and apply firm pressure across the full design. Peel the transfer film cool, then repress for 5 to 10 seconds with a protective sheet over the design.
Canvas rewards careful prep. The pressing is quick, but moisture, texture, and pressure decide whether your transfer survives the wash. DTF 2 Print makes that part easier with press-ready gang sheets built for cotton, poly, and blends, plus no minimums so you can test designs before scaling. Get started with DTF 2 Print and press transfers that hold up on every canvas project.
